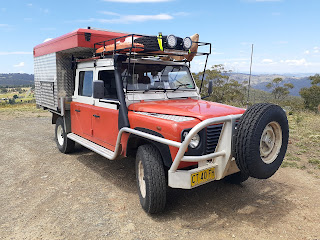
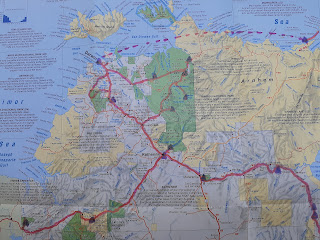
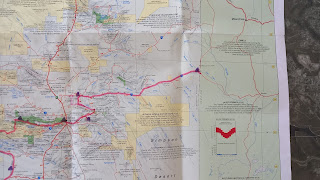
Because some people are more interested in the vehicle than our travels...
The idea was that we wanted a vehicle / camper that would go anywhere, comfortably seat and sleep 3 people and stay off-grid for up to a week. We like to cook/eat outside but have somewhere dry to sleep that could be set up super quickly (ie, <5 minutes).
What we ended up with is this:
Which quickly converts into this:
(There's also an awning that winds out. It's great when it's wet and in the middle of the day for shade, but when camping overnight we don't often use it.)
This is the kitchen - plastic drawers for food and cooking/eating equipment, a tap (70L tank) a fridge and metho stove. The fridge and stove slide up and in.
Storage on the drivers' side. Seats, water hose, fire grill, camp oven, metal bucket for heating water, fuel for the stove, access to the porta-potty.
Seating inside. Under the seats is storage - about a quarter is accessed only from inside and the rest is the camping stuff accessed from the drivers' side.
Adam's bed hanging out the back - it's about 50cm shorter than a normal single bed.
The main bed in the pop-top roof - it's double bed size with an extra 30cm added to the end. When not in use, the head end tilts up against the roof to make more space.
Under the bed there's a shelf that gives access to more storage. It's quite deep and goes 3/4 of the way t the floor (under that is where the stove slides in.) At the head of the bed is room for some more storage boxes as well.
There's also room for the battery and associated electronics. It powers the fridge, LED lights inside and out, charging ports and 12v power outlets for an invertor or compressor. It's charged by solar and can also be connected to the vehicle to be charged when the engine's running, but I haven't needed to do that.

Technical details for teh very intereste...
The vehicle: an ex-RFS 2000 TD5 Land Rover Defender 130 with a 1.8m square tray and about 70,000km on the clock when we bought it. Compared to the Toyota equivalents, it was less than half the price, has a higher payload, is a much cooler vehicle and we have a sentimental attachment to Defenders since we crossed Africa in one in the mid 1990s. Mods include: raised air intake; removed EGR; supplementary air-bag rear suspension; additional 70L fuel tank; custom roof-rack; aux battery; bespoke cubby box; storage under the rear seats; jerry-can storage under the tray; slide-out rear drawer for ropes etc; UHF CB & other electronic gizmos. Cost was about $30k for the vehicle and $5k for the bling.
The camper: we couldn't find anything that suited what we wanted (or even an empty shell to modify), so I learnt to weld and built it from scratch. Construction is steel frame, aluminium cladding and timber (mostly marine ply) interior. Materials cost about $20k, plus an unmeasured amount of time (a year's worth of school holidays plus some weekends & evenings). Electrics: 100Ah lithium battery; 2x150w solar panels; Redarc 25A charger; LED lights are mostly continuous strip that you cut to length; standard household switches.
Special mention to Dick Clarke (aka InsideOutbackCampers) who built similar-sized campers in the 1980s and gave me drawings for the folded steel sections used for the upper section of the main body and for the roof.
Construction pics...
The welding of the main frame was done at my parents' place as they have a flat double garage and were conveniently away on holidays. I made a simple wooden frame on top of 6 small dollys so I could easily move it around.
First bit of welding completed - the top section of the main camper body (the roof sits on top of this).
Frame and roof section completed
After 2 weeks annoying my parents' neighbours the main frame is completed, with matching paint. With the help of a couple of teenagers we lifted it onto the Landy to take it home.
Attaching aluminium panels in the middle of summer in the full sun wasn't the best experience! I bought the sheets from Aluminium Warehouse at Brookvale and they have a full-sheet guillotine - I only needed 3 or 4 cuts per sheet so it only cost less than $100 to get everything cut to size. The frame is still sitting on the timber frame so it can be put in the garage each night.
With most of the aluminium panels attached I bought a cheap trailer as a base to make it easier to work on and, when it was completed, simpler to lift off.
Timber work started.
Wall lining and water tank in and the rest of the layout started.
Internal timber-work partly done, single bed test fitted and fridge sitting in place to figure our how much space it needed. (There were no technical drawings!)
Seating section completed and double bed in place.
Top view. The roof is held up with gas struts and the rope is needed to pull it back down. There is storage under the seats for chairs etc and in the open bits under the bed.
Solar panels and roof light/vent added.
Repairs to the sewing machine before Helen could start on the canvas - we bought a 1950s Pfaff machine that is renowned for being good for sail-making and canvas work. Unfortunately the 73-cleat belt that drives the bottom half of the machine broke and replacements done't exist. A bit of brickies line and some time resulted in a belt that's good enough (just).
Helen did not enjoy her bit of the project...
You can buy a wiz-bang drop-down fridge slide for more that $800, or you can build you own for $80 - $50 drawer runners, $10 steel and $20 nuts and bolts. Slotted into the camper:
Once it's slid out and dropped down. (There's now a shelf at-the back for our cooker.)
First fitting of the top canvas to see where the bottom seam needs to be. (Windows yet to be added.)
Time to test it out - jacked up off the trailer ready for some careful reversing.
And it still fits!
First test in the blue mountains. Work after this pic included side windows in the canvas, tweaking the shelves, insulating and lining the ceiling, carpet, cushions and a few mods to the vehicle.
Upgrading the rear suspension.


Better storage under the rear seats.
Roof rack in progress.
Removing unnecessary bit from the engine:


That’s amazing work guys, great job!
ReplyDeleteImpressive!
ReplyDelete